

Add Audio Transcriptions to Video Meetings With Google STT

In this new era of an inclusive world, people from all races, ethnicities, and diverse cultures are collaborating and creating new ways to make this world a better place. More and more differently-abled people can participate in such a feat with pride.
On top of that, with the ever-growing remote job profiles and geographically diversely situated teams, it has become even more crucial that there are no gaps in communication among items and that the members from such diverse locations can better understand each other and feel included.
One such step in this direction is to transcribe the words that other team members are speaking. A native Asian might not understand a British accent on the first go. Similarly, an American might not understand a single French sentence if the sentence is like this. In such a case, it becomes necessary that the words a team member is speaking get transcribed for others to read so they don't feel left out.
Therefore, this blog will discuss how you can add audio transcriptions to your Dyte meetings. Not just that, we will also show you how you can convert audio transcriptions to any language that you desire. A person who understands English can see the audio transcriptions in English in real-time, even when the actual speaker is speaking French.
You can achieve this by integrating a third-party service from Google, Google Speech-to-Text (STT), in Dyte meetings. It would transcribe the audio of meeting participants as they speak. With the help of Google translate, another service from Google, these transcriptions can then be converted to the desired language of individual participants, as needed.
As usual, there are prerequisites.
Prerequisites
Before we dive into the process, it's important to note that you should have a Dyte meeting already created to transcribe the audio of participants of that meeting. Here are some valuable resources for your quick navigation:
Make sure you've read the Getting Started with Dyte topic and completed the following steps:
Create a Dyte Developer Account
Create Presets
Create a Dyte Meeting
Add Participants to the meeting
Integrate with the SDK of your choice
Assuming you have successfully integrated Dyte into your website or application, let's add audio transcriptions to your Dyte meetings.
Integration components
To achieve the audio transcriptions, we need to call GCP (Google Cloud Platform) Services: Google Media Translations and Google Translations API.
These Google services are paid. Please note that Dyte does NOT act as a broker between Google and any our clients that wants to integrate Google's services into Dyte. We recommend that our clients should directly connect with the GCP team.
However, we at Dyte provide free-of-cost code samples so our clients can seamlessly integrate with such services.
Integration steps to add audio transcription
1. Setup Google Cloud, get credentials
You must have a service account with GCP (Google Cloud Platform) to use Google transcriptions. Please create a project in that account that allows Google Media Translations and Google Translations API.
Once done, download the keys for the service account.
It would look like this:
{
  "type": "service_account",
  "project_id": "YOUR_GCP_PROJECT_ID",
  "private_key_id": "YOUR_GCP_PRIVATE_KEY_ID",
  "private_key": "-----BEGIN PRIVATE SOMETHING SOMETHING-----END PRIVATE KEY-----\\n",
  "client_email": "xxxxxx@yyyyyy.iam.gserviceaccount.com",
  "client_id": "YOUR_GCP_CLIENT_ID",
  "auth_uri": "<https://accounts.google.com/o/oauth2/auth>",
  "token_uri": "<https://oauth2.googleapis.com/token>",
  "auth_provider_x509_cert_url": "<https://www.googleapis.com/oauth2/v1/certs>",
  "client_x509_cert_url": "<https://www.googleapis.com/robot/v1/metadata/x509/xxxxx%40yyyyy.iam.gserviceaccount.com>"
}
Once you have these, let's proceed to the next step.
2. Setup a backend Server to call these APIs securely
If you have used Google services before, you would know that these services are costly. They can charge you a lot. You would not want to expose your credentials for miscreants to exploit.
If you put these credentials in your frontend code, anyone could get a hold of this and land you with a considerable charge.
Therefore, we will not expose these credentials. We will put them in your backend services for safer usage. This would give you better control to ensure no unauthorized personnel can use your APIs and access your information.
For this, we have provided the BE sample in NodeJS for you to see. Please find it here. Currently, we only have NodeJS samples; if you're working on a different backend, feel free to port this code or connect with us to help you port it.
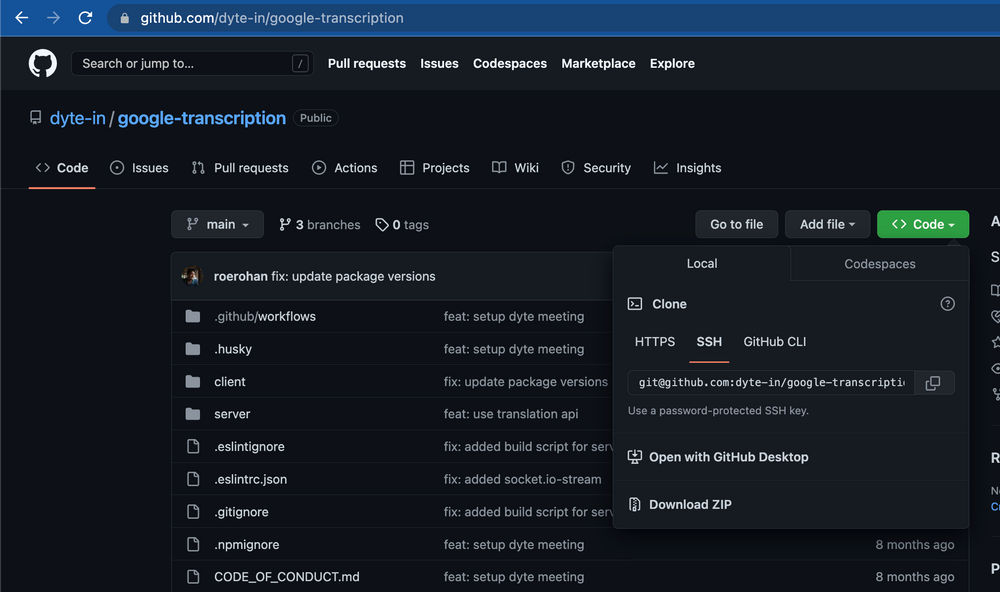
To use this sample, Please clone this using the following command.
git clone git@github.com:dyte-in/google-transcription.git
Or simply download it as a Zip. Use Code (Green Icon → Download ZIP) and extract once downloaded.
Now that you have downloaded the repository. Please proceed with the following steps to set up your backend endpoint.
2.1 Go to the server folder
cd server
2.2 Replicate .env.example as .env
cp .env.example .env
Open the .env in your choice of Text File Editor. Edit it as per your GCP service account credentials and Save it.
Note: PRIVATE_KEY should be in a single line. Try picking the value from the service account's key's JSON file as is.
2.3 Install NPM packages
This would automatically install @google-cloud/media-translation, @google-cloud/speech, and @google-cloud/translate.
npm install
2.4 Run the server
npm run dev
If successful, you will see the confirmation in Terminal that it is running on localhost:3001 or the PORT specified in the .env file.
This endpoint (https://localhost:3001) will be called the backend_url from now on. We advise you to copy the code from Dyte Google Transcription and alter it as per your need and security practices.
We strongly advise you not to use this code as is, without a proper security mechanism, for production.
3. Integrate the SDK in the frontend project
Now that the backend setup is ready, let's start with the frontend setup.
3.1 Install the FE package in your FE codebase
The first action would be to install Dyte's wrapper package to take out complexity from you in frontend integration using:
npm install @dytesdk/google-transcription
If you are interested in knowing what this package does behind the scenes, and this is something we recommend you to check out, refer to https://github.com/dyte-in/google-transcription/tree/main/client so that you can further customize the code to your liking.
3.2. Integrate the Google Transcription SDK with the Dyte meeting
The second step is to look for the place in your codebase where you are initiating a Dyte meeting.
Once you have found the place and got a hold of the meeting object, add the following code to the file to import the FE SDK.
import DyteGoogleSpeechRecognition from '@dytesdk/google-transcription';
Add the following code just after the point where you have access to the meeting object.
const speech = new DyteGoogleSpeechRecognition({
    meeting, // Dyte meeting object from DyteClient.init
    target: 'hi', // Language that the current user wants to see
    source: 'en-US', // Language that the current user would speak in
    baseUrl: <backend-url>, // Backend URL from step 2.4
});
speech.on('transcription', async (data) => {
    // ... do something with transcription
});
speech.transcribe();
Here you are setting up the GoogleSpeechRecognition with the values that the current user would prefer and activating the recognition just afterward using speech.transcribe(). Then we listen to every new transcription using speech.on(’transcription’, aJsCallbackFunction).
To see the support languages, please refer to
With this, you would now be able to receive the live transcriptions. Feel free to put them in UI as per your need. Please refer to this if you need a sample of how to do it.
<!DOCTYPE html>
<html lang="en">
   <head>
      <meta charset="UTF-8" />
      <meta http-equiv="X-UA-Compatible" content="IE=edge" />
      <meta name="viewport" content="width=device-width, initial-scale=1.0" />
      <title>Google Transcriptions Demo </title>
      <!-- UI Kit -->
      <script type="module">
         import { defineCustomElements } from 'https://cdn.jsdelivr.net/npm/@dytesdk/ui-kit/loader/index.es2017.js';
         defineCustomElements();
      </script>
      <!-- Web Core -->
      <script src="https://cdn.dyte.in/core/dyte.js"></script>
      <script src="https://cdn.jsdelivr.net/npm/@dytesdk/google-transcription@1.0.1/dist/index.umd.min.js"></script>
      <style>
         body {
         height: 100vh;
         width: 100vw;
         }
         #dyte-transcriptions{
         position: absolute;
         z-index: 99999;
         bottom: 15%;
         width: 100%;
         display:flex;
         flex-direction: column;
         justify-content: center;
         align-items:center;
         }
         .dyte-transcription-line{
         display: block;
         max-width: 80%;
         text-align: center !important;
         }
         .dyte-transcription-speaker{
         font-weight: 500;
         color: orange;
         }
         .dyte-transcription-text{
         color: white;
         }
      </style>
   </head>
   <body>
      <dyte-meeting id="my-meeting"></dyte-meeting>
      <div id="dyte-transcriptions"></div>

      <script>
         const roomName = ''; // Put roomName if using v1 APIs. Leave Blank for v2 APIs
         const authToken = ''; // Put v1 or v2 participant auth token

         async function initMeeting() {
           const meetingEl = document.getElementById('my-meeting');

           const meeting = await DyteClient.init({
             authToken,
             roomName,
             defaults: {
               audio: false,
               video: false,
             },
           });

           meetingEl.meeting = meeting;

           const speech = new DyteGoogleSpeechRecognition({
               meeting,
               target: 'hi',
               source: 'en-US',
               baseUrl: 'http://localhost:3001', // Replace with backend_url from step 2.4
           });


           speech.on('transcription', async () => {
               const transcription = document.getElementById('dyte-transcriptions');
               const list = speech.transcriptions.slice(-3);
               transcription.innerHTML = '';
               list.forEach((item) => {
                   const speaker = document.createElement('span');
                   speaker.classList.add('dyte-transcription-speaker');
                   speaker.innerText = `${item.name}: `;

                   const text = document.createElement('span');
                   text.classList.add('dyte-transcription-text');
                   text.innerText = item.transcript.trim() !== '' ? item.transcript : '...';

                   const container = document.createElement('span');
                   container.classList.add('dyte-transcription-line');
                   container.appendChild(speaker);
                   container.appendChild(text);

                   transcription.appendChild(container);
               });
           });

           speech.transcribe();
         }

         window.onload = async function () {
           initMeeting();
         };
      </script>
   </body>
</html>
Check out how the audio transcription will appear in your Dyte Meetings here.
Now you have a full-fledged working Google Speech-to-Text integration with custom language translations for your Dyte Meetings.
I hope you found this post informative and engaging. If you have any thoughts or feedback, please get in touch with me on Twitter or LinkedIn. Stay tuned for more related blog posts in the future!
If you haven't heard about Dyte yet, head over to dyte.io to learn how we are revolutionizing communication through our SDKs and libraries and how you can get started quickly on your 10,000 free minutes, which renew every month. If you have any questions, you can reach us at support@dyte.io or ask our developer community.


